As we age, our homes often collect years of memories and belongings. Decluttering can feel overwhelming when facing decades of accumulated items. Getting rid of excess stuff can improve your safety, reduce stress, and make daily living easier.
You might wonder where to begin when every item seems essential. Let’s talk about practical decluttering strategies for seniors. With these tips we’ll help you create a more organized living space.
1) Start the Decluttering Journey in a Small Space

Believe me, we know that decluttering your entire home can feel overwhelming. Instead, begin with just one small area that bothers you. Some examples are a kitchen drawer, bedside table, or living room corner.
Small spaces are easier to tackle and give you a quick sense of accomplishment. You’ll feel good seeing even one tiny area completely organized.
Set a timer for 15-30 minutes to work on your chosen space. Short sessions help prevent fatigue and keep you from getting discouraged.
Remove everything from the small space first. Removing things gives you a clean slate to work with. Wipe down the empty area before putting things back.
Sort items into simple categories: keep, donate, throw away, or relocate. Be honest with yourself about what you truly need and use.
When putting items back, only return what belongs in that space. Always find new homes for the “relocate” items.
Once you complete one small space, take a moment to enjoy your success, give yourself a treat. Afterwards just take a photo to remember how awesome it looks.
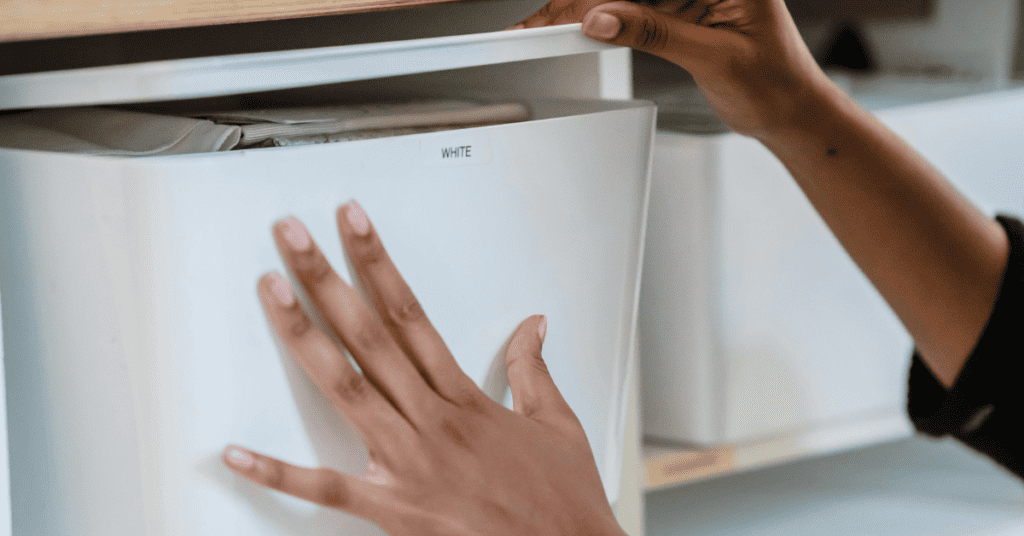
2) Utilize Clear Storage Bins
Clear storage bins are your best bet for organizing. Unlike solid-colored containers, clear bins let you see what’s inside without opening them. You won’t waste time and energy searching for items if you do it right the first time!
Label each bin with large, easy-to-read tags. You can use a simple marker on masking tape or printed labels. This extra step makes finding things even faster.
Clear bins work well in closets, under beds, and in garage spaces. Stack them neatly to maximize your storage space while keeping everything visible.
Be sure to choose bins with secure lids so you don’t give dust and moisture a way in. Did you know that dust mites thrive in humid environments? Using bind with handles makes it easier to pull from shelves or move around.
Sort similar items together in each bin. For example, keep all holiday decorations in one bin and winter clothes in another. This organization system helps you find things quickly when you need them.
Consider smaller clear containers for items like medications, craft supplies, or desk accessories. These can fit in drawers while still keeping contents visible and organized.
3) Donate All of Your Unused Items

Help others by donating your used things. We found so many unique charities that welcome gently used clothing, furniture, books, and household goods. There are even some charities that will come to you and pick up used items.
Local options for donations include thrift stores, churches, and community centers.
Before donating, call ahead to confirm what items the organization accepts. Some places don’t take certain items like mattresses or outdated electronics.
Consider specialty donations, too. Libraries welcome books, while schools might need art supplies. Animal shelters often need old towels and blankets.
Take a photo of meaningful items before donating if you want to preserve the memory without keeping the object. Photos allow you to hold onto the sentiment while freeing up space.
Remember that donations may be tax-deductible. Ask for a receipt when you drop off your items. However this is just an added benefit and not the reason for donating.
4) Create a Sorting System

Having a quick sorting system will make the process much more manageable. We want you to start by setting up four containers labeled: Keep, Donate, Trash, and Decide Later.
The “Keep” bin is for items you use regularly or that bring you true joy. Be honest with yourself about what belongs here—it should not become the default option.
Your “Donate” container is for items that are still in good condition but you no longer need. These can benefit others through charities, family members, or friends.
The “Trash” bin is for broken, unusable, or expired items. Remember that some things might need special disposal, like electronics or medications.
Use the “Decide Later” bin sparingly for items you’re truly unsure about. Set a deadline to revisit these items so they don’t become clutter again.
Work on one room or even one drawer at a time. Starting very small prevents you from feeling overwhelmed by the process.
Consider asking close friends or family members to help you sort. Having the emotional support with the added objective opinion can be helpful. Especially if you have a lot of stuff.
5) Keep Sentimental Items
When decluttering, holding onto things that truly matter is okay. During your cleaning process not everything needs to be thrown away on the first time around
Choose items that bring back your fondest memories or connect you to loved ones. It could be your late spouse’s favorite watch, your grandchild’s first drawing, or photos from special trips.
Try to be selective about what you keep. Ask yourself if the item brings you absolute joy when you see it. Find a special place to display or store it properly if it does.
We want you to create a memory box for smaller items. Memory boxes can be a nice way to organize keepsakes rather than be scattered throughout your home.
Additionally, for larger collections, think about keeping just a few favorite pieces. One great tip is to take photos of items before passing them along. Remember that the goal isn’t to get rid of all your memories. In truth we just want you to surround yourself with the ones that matter most.
6) Schedule Regular but Short Decluttering Sessions

Did you know that studies show that setting aside specific times for decluttering can make the chore seem less overwhelming? Start by scheduling short, 15-30 minute sessions. Then do this a few times each week instead of trying to tackle everything at once.
Mark these decluttering appointments on your calendar and treat them like any other important commitment. Consistency is more important than length—small, regular efforts add up over time.
Consider which time of day you have the most energy. For many seniors, mornings provide the best focus and stamina for decision-making tasks.
Set realistic goals for each session. Perhaps you’ll focus on one drawer, one shelf, or sorting through a specific category like books or clothing.
Reward yourself after completing a session. A cup of tea, a piece of chocolate, a phone call with a friend, or watching a favorite show can make decluttering feel more optimistic.
7) Use Labels for Organization
Using labels can level up your organization skills. I start by gathering a few basic tools—a label maker, adhesive labels, or sometimes even just masking tape and a marker. What I use will depend on what I have on hand and my budget.
Over time, I’ve discovered that a little color-coding goes a long way. For instance, I often use blue for kitchen items, green for gardening supplies, and red for those essential documents I don’t want to lose track of. This simple system helps me spot what I need almost instantly.
I make sure that my labels are large and clear, using bold, dark text on light backgrounds so they’re easy to read at a glance. When my handwriting isn’t up to scratch, I don’t hesitate to ask a family member for a hand. But if you invest in a label maker, get one that prints in a clear, large font.
Another trick I rely on is labeling storage containers on multiple sides. That way, even when I stack boxes or see them from a different angle, I always know what’s inside.
8) Opt for Multi-Functional Furniture
Furniture serving multiple purposes can be a game-changer when you want to declutter your home. Consider replacing your standard coffee table with one that has drawers or shelves underneath for extra storage.
Ottomans are another great option. They can work as a footrest or extra seating; many come with storage space inside for blankets or magazines.
You can tuck away a fold-down desks or tables, which will help free up valuable living space. If you live in a smaller home or apartment these may be essential.
Bookshelf room dividers serve two purposes: separate spaces while providing storage for books and decorative items. This keeps your items organized while making good use of vertical space.
9) Digitize Important Documents
Not only can paper clutter can take up a lot of space but it can also attract pests. Converting important documents to digital formats can free up room and keep your information organized.
Start by sorting through papers to decide what needs to be kept. Bills, medical records, insurance policies, and family photos are good candidates for digitizing.
You can use a scanner or even your smartphone with a scanning app to create digital copies. Many phones have built-in scanning features that work well for this purpose.
Create a simple folder system on your computer to store these files. Name folders clearly: “Medical Records,” “Tax Documents,” or “Family Photos.”
Remember to back up your digital files. For extra security, you can use an external hard drive, cloud storage like Google Drive, or both.
After digitizing, shred any sensitive documents you no longer need to keep as paper. This helps protect your personal information.
Ask a family member for help if technology feels overwhelming. They can set up a system that’s easy for you to use and understand.
10) Set Realistic Goals
Decluttering your home takes time, especially if you’ve lived there for many years. Don’t expect to finish everything in a single day or even a week.
Start with small, achievable goals that won’t leave you feeling overwhelmed. Maybe aim to clear one drawer or a single shelf rather than an entire room at once.
Break larger projects into smaller steps. For example, instead of tackling your entire garage, focus on just organizing your tools first.
Consider your energy levels and physical abilities when planning decluttering sessions. You might work best with short 15-30-minute sessions rather than hours at a time.
Use a calendar to mark specific decluttering days. This helps you stay on track without feeling pressured to work on it every day.
Celebrate your progress along the way! Each small victory, whether clearing off a countertop or organizing your medicine cabinet, deserves recognition.
Remember that perfectionism can be your enemy when decluttering. Good enough is truly good enough when it comes to organizing your space.
Maintaining a Clutter-Free Lifestyle
Keeping your home organized means building consistent habits that promote a clutter-free life. It’s all about those small daily choices that prevent clutter from returning. By implementing these ongoing practices you’ll enjoy a tidy space for years to come.
Developing New Habits
Start by creating a “one-in, one-out” rule. When you bring a new item home, remove something similar. This simple habit prevents accumulation over time.
Set aside 15 minutes each day for quick tidying. This short time commitment feels manageable and keeps small messes from growing into big problems.
Use the “touch it once” principle when handling mail and papers. Instead of setting items down to deal with later, make an immediate decision—file it, act on it, or toss it.
Create designated homes for frequently used items. Keys, glasses, and remote controls should have specific spots where you always return them.
Try the “two-minute rule”—if a task takes less than two minutes (like hanging up a coat or washing a dish), do it immediately rather than putting it off.
Consider taking photos of sentimental items before donating them. This preserves the memory while freeing up physical space in your home.